Dried flowers are a trend that’s going nowhere, whether for weddings or your home. We’ve lined up this gorgeous DIY wedding bouquet project from a new book that gives a modern spin to the craft of growing, drying and displaying blooms
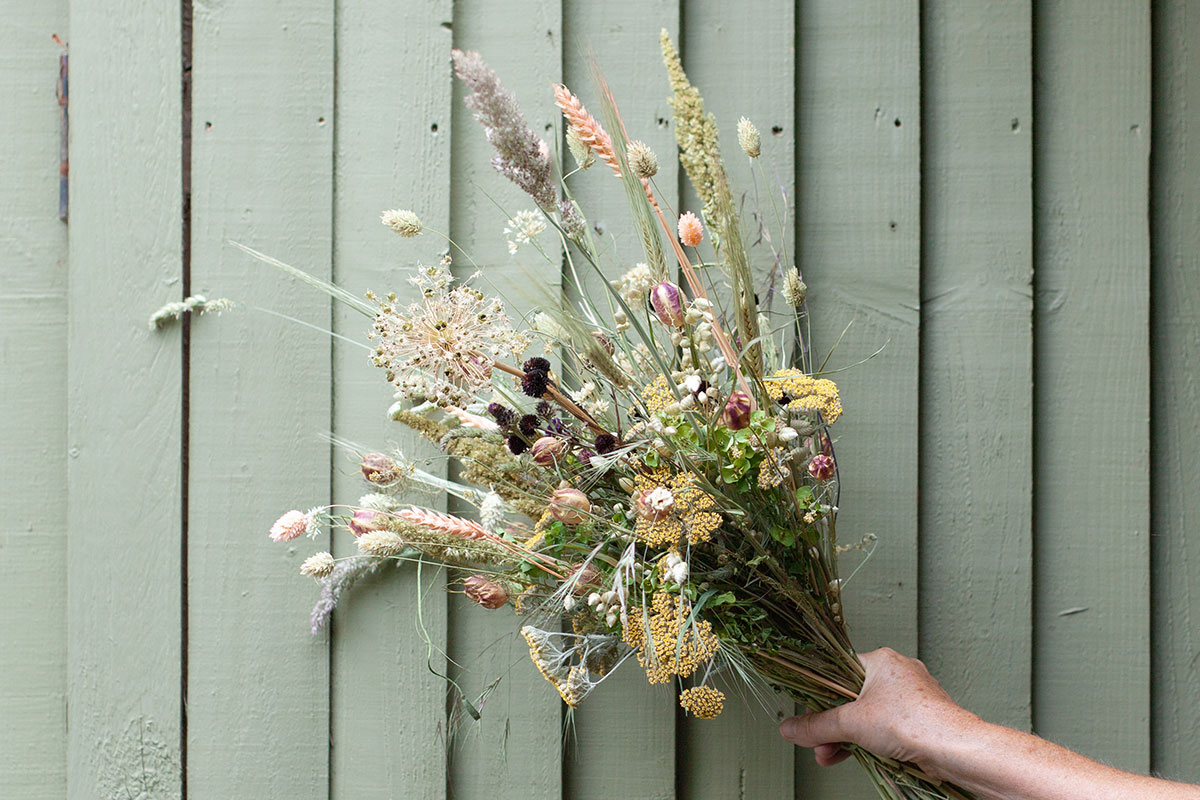
Whether you are looking for elegant bridal arrangements or trying to add a little bohemian flair to your home, new book Cut & Dry by Carolyn Dunster features an array of dried flower projects and designs that will complement every aesthetic and occasion.
Bouquets are a wonderful way to bring all sorts of dried material together. Experiment with mixing colours and textures to create different effects. A hand-tied bouquet is a simple place to begin.
Let Carolyn guide you through it, step by step…

Materials required (shown above)
- Mix of dried foraged grasses, such as moor grass (Molinia), Persian rye grass (Lolium persicum) and flowering rye grass (Lolium)
- Mix of dried foraged flowers, such as brook thistle (Cirsium rivulare), ox-eye daisies (Leucanthemum vulgare), yarrow (Achillea) and rapeseed (Brassica oleracea)
- 12 stems of spurge (Euphorbia)
- 1 ornamental onion (Allium) seed head
- 15 stems of barley (Hordeum vulgare)
- Mix of small and large poppy (Papaver) seed heads
- 18 stems of greater quaking grass (Briza maxima)
- 18 stems of canary grass (Phalaris canariensis)
- 3 stems of coneflower (Echinacea) seed heads
- 12 stems of love-in-a-mist (Nigella damascena) seed pods
- 12 stems of snow-white wood-rush (Luzula nivea)
- 3 stems of love-lies-bleeding (Amaranthus caudatus)
- Sharp flower snips
- Length of ribbon or twine
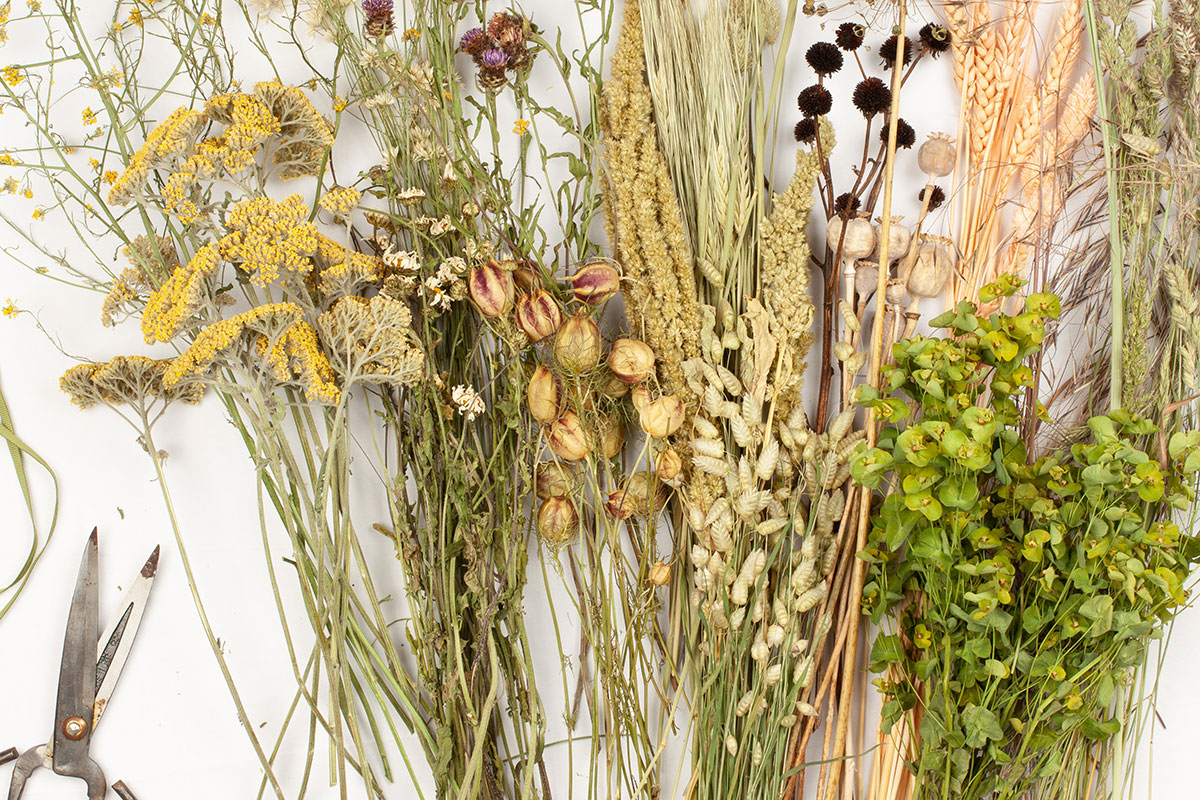
Step 1 (above)
Lay your ingredients in groups on a flat surface in front of you.
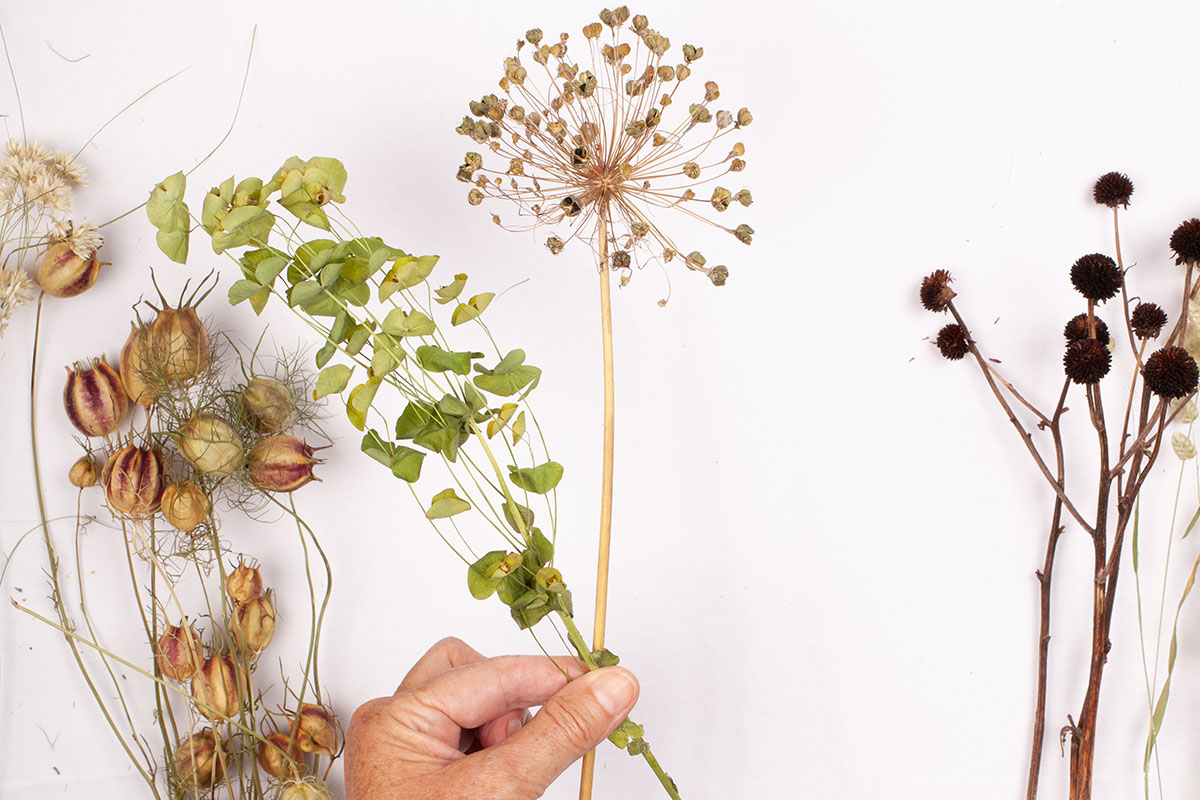
Step 2 (above)
Start with the single ornamental onion head, or another large round-headed flower, and keep this as your central point. Position the stem between the thumb and forefinger of your left hand if you are right-handed, or your right if you are left-handed. Add a spurge stem to cross over the ornamental onion stem at a slight angle using your other hand. Take hold of it with your first hand and twist clockwise.
Step 3 (below left)
Gradually add a few stems from each of the plant groups in rotation, twisting in the same direction as you go. You are holding them at what will be the binding point. Loosen your grip and hold midway down the stems for natural-looking results. The higher the binding point, the tighter the bouquet will be.
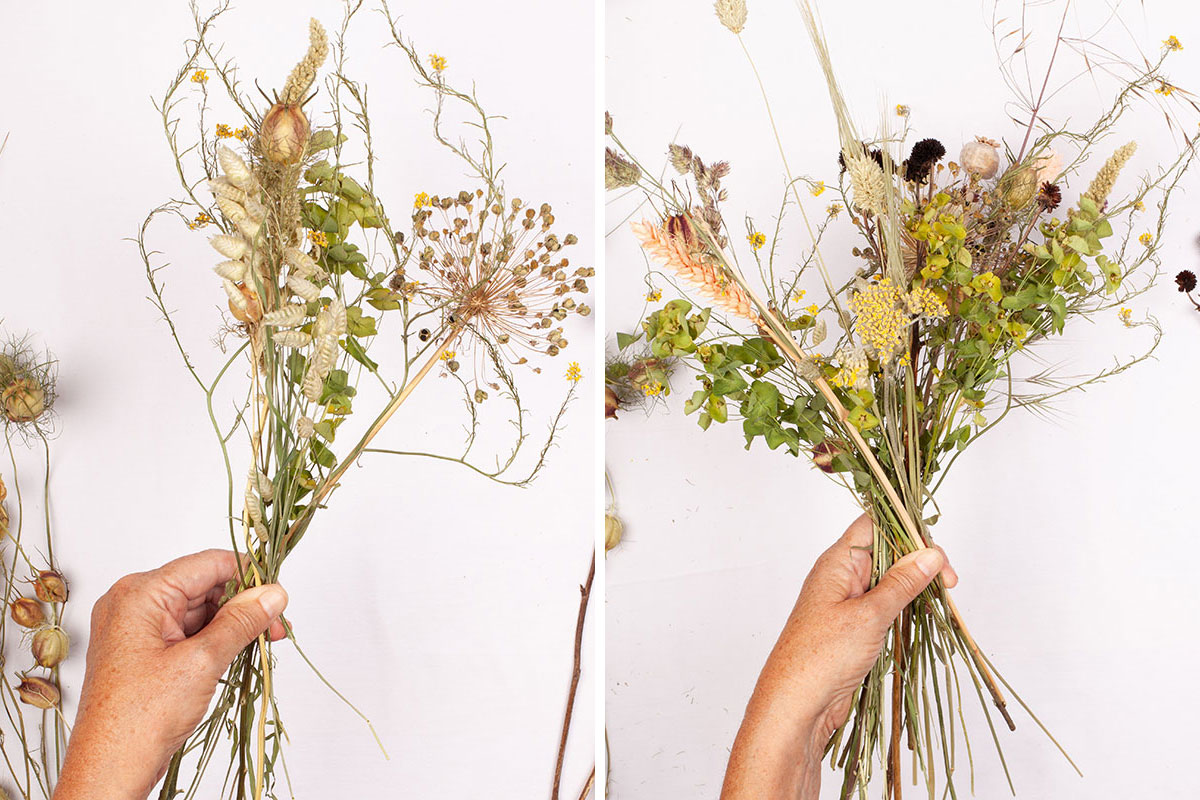
Step 4 (above right)
Aim for an even, circular distribution of flowers, grasses and seed heads, and keep checking by holding it up. It’s easier to remove anything at this stage than after it is tied.

Step 5 (above)
When you are happy with the shape, bind the stems with twine or ribbon using a lasso-style knot. To create a naturalistic look, pull up some of the taller grasses and seed heads so that they tower above the flowers.
Step 6 (below left)
Finally, cut the stems to the same length on the diagonal. If you plan to display your bouquet immediately in a vase, check the height by holding the bouquet against the vase before you cut anything.
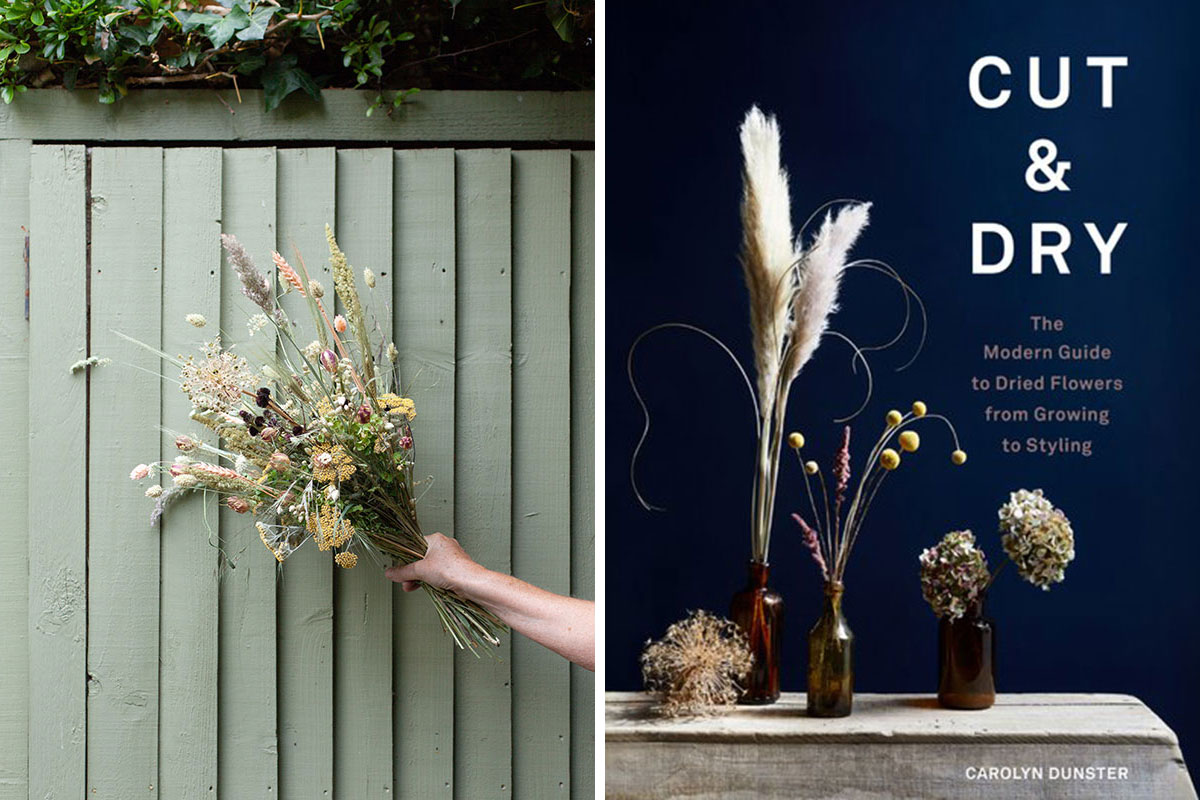
Carolyn Dunster is a botanical stylist, planting designer and garden writer who has trained with famed wedding florist Jane Packer. Her book Cut & Dry: The Modern Guide to Dried Flowers from Growing to Styling (pictured, above right) is out now. Photography by Iva Riveros. Published by Laurence King.